


The foundation should look smooth and natural on the skin. Yet many people notice streaks, uneven coverage, or heavy texture after applying makeup.
This usually happens when the foundation is applied too thickly or blended with the wrong technique. Visible brush lines, product buildup, and dry skin patches can also make makeup look uneven.
Professional makeup artists avoid these problems by focusing on three key steps: proper skin preparation, thin foundation layers, and controlled blending.
These methods create the soft, smooth finish commonly associated with airbrush makeup.
You do not need airbrush equipment to achieve this effect. With the right techniques and blending tools, you can create the same smooth finish at home.
What Is an Airbrush Makeup Look?
An airbrush makeup look refers to a complexion that appears smooth, even, and natural. The skin looks refined, with soft coverage that blends into the face without visible streaks.
This finish is often seen in bridal makeup, editorial work, and professional photo shoots.
Key characteristics include:
- Even skin tone
- Softened appearance of pores
- Smooth texture
- Natural-looking coverage
- Balanced foundation layers
Traditionally, this look is created with cosmetic airbrush equipment that sprays foundation onto the skin. The sprayed product forms a thin and even layer.
However, many makeup artists create a similar finish using traditional brushes and blending sponges. The result depends more on the blending technique than the equipment.
Why Airbrush Makeup Looks So Smooth
Several factors work together to create a smooth makeup finish.
Skin Preparation
Hydrated skin helps foundation spread evenly. When skin is dry or textured, foundation settles into uneven areas.
Thin Foundation Layers
Airbrush-style makeup uses light layers of foundation. This prevents heavy buildup and keeps the skin looking natural.
Blending Technique
Professional artists blend foundation using tapping and buffing motions. These movements spread the product evenly without leaving streaks.
Tool Selection
Brush shape and bristle density influence how foundation spreads across the skin. The right tools help smooth the product while reducing visible texture.
When these steps are combined, the complexion appears soft and refined.
Step-by-Step Guide to Creating an Airbrush Makeup Look
Step 1: Prepare Your Skin for Smooth Makeup
Good skin preparation helps the foundation apply evenly. Start by cleansing your face to remove oil and residue. Follow with a moisturizer that suits your skin type.
Moisturized skin prevents foundation from catching on dry patches. If your skin has visible flakes, gentle exfoliation before makeup can help create a smoother base.
Healthy skin improves the final appearance of foundation.
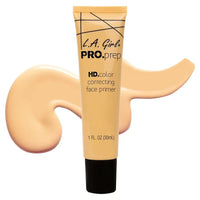
Step 2: Use the Right Primer
Primer helps create a smooth surface before foundation. It fills small pores and fine lines, so makeup spreads more evenly.
Different primers work best for different skin types.
- For oily skin, a mattifying primer helps control shine.
- For dry skin, a hydrating primer helps foundation glide smoothly.
Primer also helps makeup last longer throughout the day.
Step 3: Apply Foundation in Thin Layers
Applying too much foundation at once often leads to cakiness. Instead, build coverage gradually.
Place small dots of foundation on the forehead, cheeks, and chin. Spread the product lightly before blending.
Add more product only where extra coverage is needed. Thin layers keep the skin looking natural.
Step 4: Blend Using the Right Foundation Brush
Different foundation brushes produce different blending results.
Flat Foundation Brush
The Flat Foundation Brush helps spread liquid foundation across the skin.
It works well for placing the product evenly before blending.
This brush is useful around the nose and under-eye area, where precision matters.

Pro Stippling Brush
The Pro Stippling Brush creates a soft finish through tapping motions. This technique distributes foundation lightly across the skin.
The result looks similar to the soft diffusion created by cosmetic airbrush systems.

Angled Buffer Brush
The Angled Buffer Brush blends foundation into the skin using buffing motions.
Dense bristles help smooth the product while evening out coverage.
Circular blending movements help reduce streaks.
Many makeup artists use more than one brush during foundation application.

Step 5: Perfect the Finish With a Blending Sponge
A blending sponge is often used after brush application. The sponge presses foundation gently into the skin. This helps smooth visible brush lines.
It also removes excess product from the surface of the skin.
Using a damp 2 Pack Blending Sponge or Angled Blending Sponge With Stand, press the sponge lightly across the face.
Avoid wiping motions. Pressing helps create a soft and natural finish.
Step 6: Blend Concealer Without Creating Texture
Concealer should blend smoothly into the foundation layer. Apply a small amount under the eyes or over areas that need extra coverage.
Use light tapping motions to blend the edges. Applying too much concealer can create visible texture. Light layers maintain a smooth complexion.
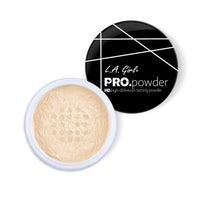
Step 7: Set the Makeup Without Caking
Setting powder helps foundation stay in place.
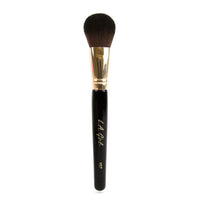
However, applying too much powder can make the skin appear dry. Use a Large Powder Brush to apply a light layer of powder.
Focus on areas that tend to crease or become oily. A soft dusting of powder keeps the makeup balanced while maintaining a natural finish.
Brush vs Sponge for an Airbrush Makeup Look
Both brushes and sponges play important roles in makeup blending.
Brush Benefits
- Faster product application
- Better control of foundation placement
- Efficient blending across larger areas
Sponge Benefits
- Smooths visible brush lines
- Presses foundation into the skin
- Removes excess product
Many artists combine both tools during the foundation application. You can learn more about the differences in this guide on makeup brushes vs sponges.
Understanding how to choose the right makeup brushes can also improve blending results.
Best Foundation Types for an Airbrush Finish
The formula of the foundation affects how smooth the final result appears.
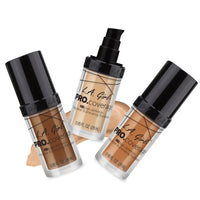
Liquid Foundation
Liquid foundations spread easily and blend well with brushes and sponges.
They are commonly used for airbrush-style makeup.
Cream Foundation
Cream foundations provide more coverage.
When blended carefully, they can still produce a smooth finish.
Lightweight Foundations
Lightweight formulas help maintain a natural appearance. They are ideal for everyday makeup.
Choosing the best foundation for an airbrush look depends on your skin type and coverage preference.
Common Mistakes That Ruin an Airbrush Makeup Look
Several mistakes can affect the smoothness of the foundation.
- Applying too much foundation at once
- Dragging foundation across the skin
- Skipping skin preparation
- Using brushes with very stiff bristles
- Applying too much powder
- Not blending around the jawline or hairline
Dirty brushes can also affect blending. Learning how often to clean makeup brushes helps maintain smooth application.
Pro Makeup Artist Tips for a Flawless Airbrush Finish
Professional makeup artists follow a few simple habits when applying foundation.
Start blending from the center of the face, where coverage is needed most.
Use tapping or stippling motions instead of dragging the brush. Apply foundation in thin layers.
Allow each layer to settle before adding more product.
Press the foundation gently into the skin with a sponge after brush blending.
Quality tools also improve blending control. Many artists value the benefits of high-quality makeup brushes when creating smooth makeup looks.
If you are building a brush kit, exploring a full Makeup Brushes Collection helps ensure you have the right tools for different steps.
Frequently Asked Questions
Can you achieve an airbrush makeup look without an airbrush machine?
Yes. A smooth finish can be created using traditional brushes and blending sponges. Thin layers of foundation and proper blending techniques help produce a similar effect.
What foundation gives the best airbrush finish?
Liquid foundations often produce the smoothest result because they blend easily and allow gradual coverage building.
Is a sponge or a brush better for airbrush makeup?
Both tools work well together. Brushes spread foundation evenly, while sponges refine the finish and smooth the texture.
How do makeup artists make foundation look flawless?
Makeup artists prepare the skin carefully, apply foundation in thin layers, and blend using controlled tapping and buffing motions.
How do you prevent foundation from looking cakey?
Using small amounts of product, blending carefully, and avoiding excess powder can help maintain a natural finish.
Final Thoughts
Creating a smooth airbrush makeup look depends on technique rather than equipment.
Good skin preparation, thin foundation layers, and careful blending all help produce a refined finish. Brushes distribute product evenly, while blending sponges help smooth the final texture.
With practice, these techniques can help you achieve a soft and natural makeup finish at home.